I love this time of year, days get longer, weather gets better and the opportunities for getting out on the bike increase substantially 🙂
That means that for a lot of people (me included this year – I have been confined to my Wattbike since October) it will be the first time in months that you have ridden your bike – or – may be the first time that it has been unbolted from your turbo trainer.
It is important to remember that bikes, like any machine can and will deteriorate over time if they are not used/maintained.
SO
Lets have a look at some of the things you should check/change before getting back out there……
1. Change your handlebar tape and check your bars/stem
This one applies to all but especially those of you who have been grinding away on the turbo, lets talk about why….
As you may know, when you ride your bike on the turbo trainer you sweat a bit (a lot if you are me) – that sweat pretty much directly hits your handlebars (and everything else below them, more on that later).
Now you may or may not know but sweat is salty – very salty.
Salt water is one of the worst things that you can apply for time to a metal surface, making sweat one of the most corrosive things your bike will endure.
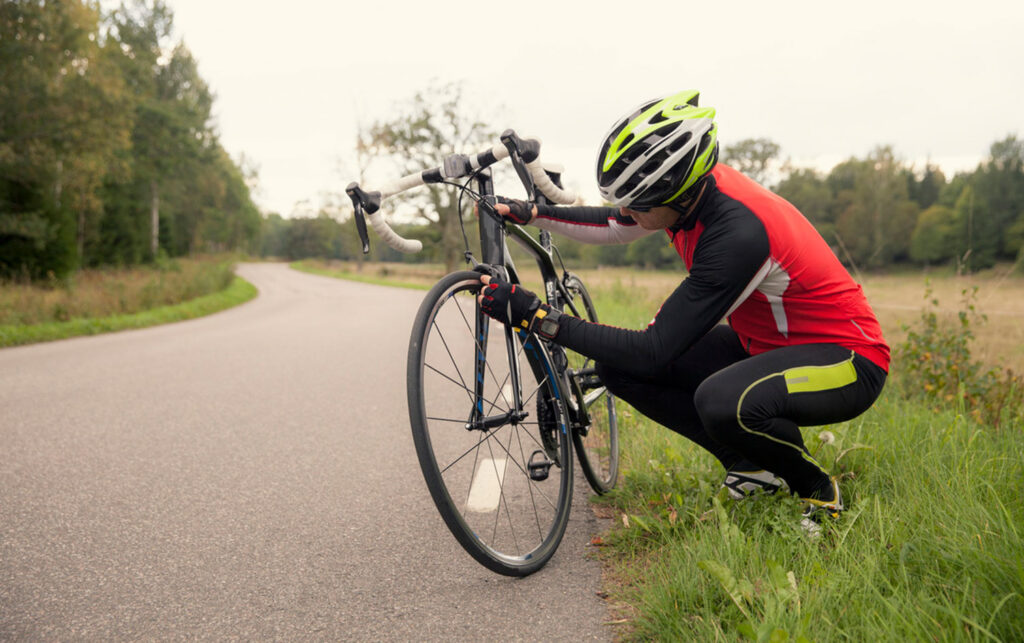
Partner that up with handlebar tape – which may as well have been explicitly designed to hold sweat against the bars and you have a recipe for disaster – see the picture below…….

The other issue comes down to general wear and tear, I can pretty much guarantee you that before you put your bike away for the winter you probably gave it a clean but didn’t check it over (why would you).
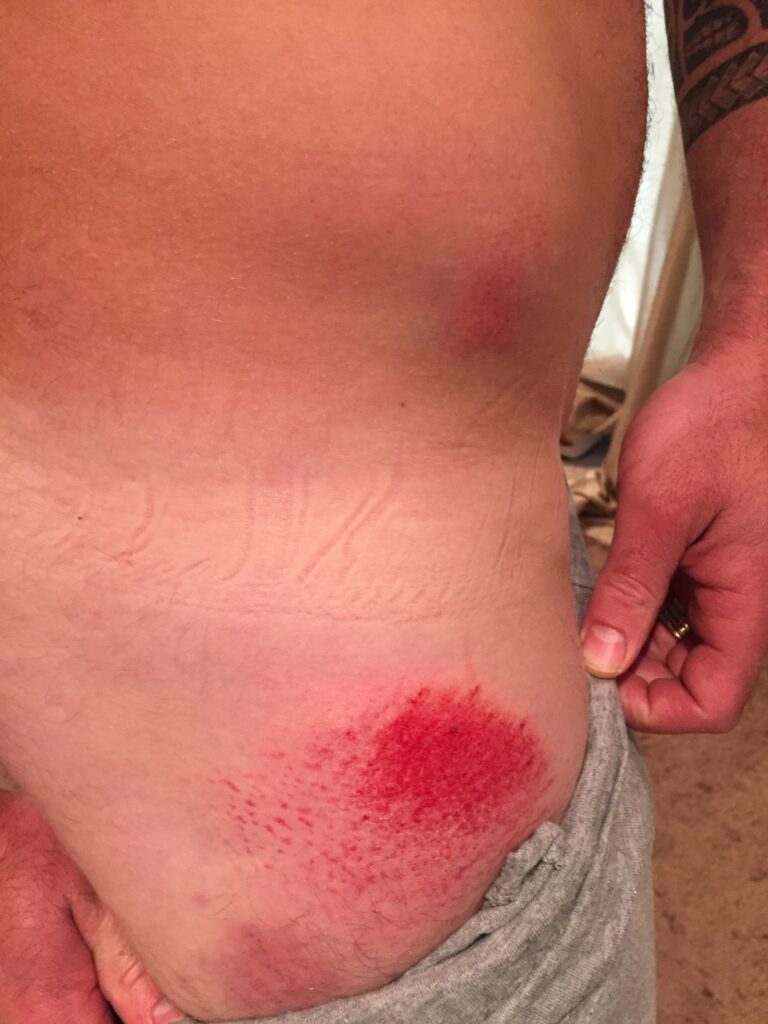
If there were any small cracks, damage to the clamps or anything else and the bike has been sat in a cold environment then the integrity of the handlebars could be seriously compromised, this can lead to the handlebars snapping with no warning – I know from personal experience that this is not a fun crash to have, again, see below….
So get that handlebar tape off, have a good look at your bars including all around the stem and the stem clamps to make sure there are no cracks, oxidation or other nastiness (as a bonus, new handlebar tape has been scientifically proven to make your bike faster).
2. Check Your Brake and Gear Cables (or hoses on hydraulic brakes)
This may be a more obvious one – you want to check 2 things.
Firstly do the cables still move easily in the housings, if you washed your bike then left it for the winter, standing water could corrode and seize the cables (not ideal for braking power – also not great for the smooth operation of your gears).
Secondly you want to make sure the cables are not frayed and likely to snap.
For hydraulics, check there are no leaks anywhere and that the levers still feel ‘firm’ – if not they may need a bleed.
Its an easy check this one – just pull the brakes to make sure they are smooth and have a run through the gears 🙂
3. Check your bearings
There are 4 major rotational points on a bike…. Headset, Bottom Bracket and Hubs.
Rotating stuff (technical term alert) nearly always requires a bearing to keep the movement smooth.
The bearings on a bike need to be kept greased and dry as far as possible, so one of the things to check (especially if the bike hasn’t moved) is how the bearings are spinning.
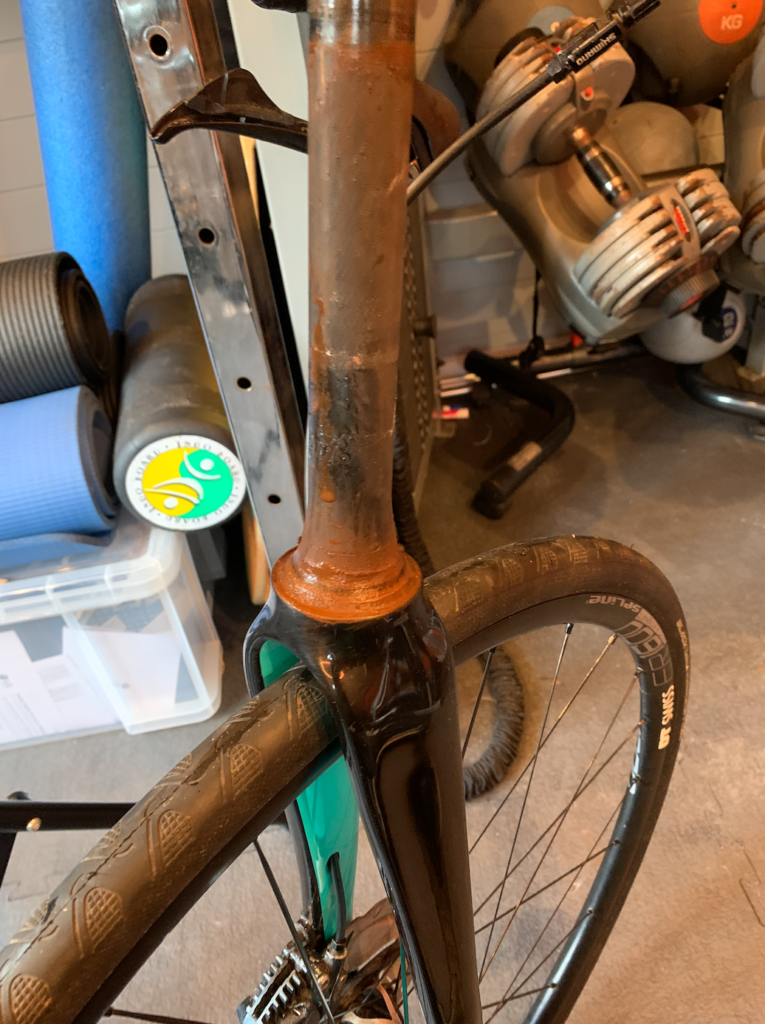
As a side note – if you ride the bike indoors on a trainer you DEFINITELY need to test the headset bearings – check out the before and after on these pics for what seat ingress can do to a bearing……
The good news is that this is the easiest one to check quickly, just give the wheels a spin in a quiet place (they should be silent and should feel smooth – so not transmitting any vibration through the frame), likewise with the cranks.
For the headset, just turn the bars a few times, as above, it should feel smooth and be silent.
4. Check your frame and seatpost
As with your handlebars, you don’t want a sudden frame or seatpost failure, it never has a good ending!
So give them both a good once over, check for cracks OR any lines of strange colour in the paint (that could indicate a crack under the paint), if you find one DO NOT ride the bike!
5. Check your tyres
Dead easy this one – have a look at them, are there any big cuts in them, has the rubber perished at all (so is it starting to crack) do they hold air pressure?
Last thing you want on your first ride out is to get a puncture!!
And that is it – I bet you are itching to get out on the bike – if you want to check out the servicing options we have that would take care of all of the above for you then click the button below, otherwise, have a great spring season of riding – and remember, start slow and ease into it 🙂